
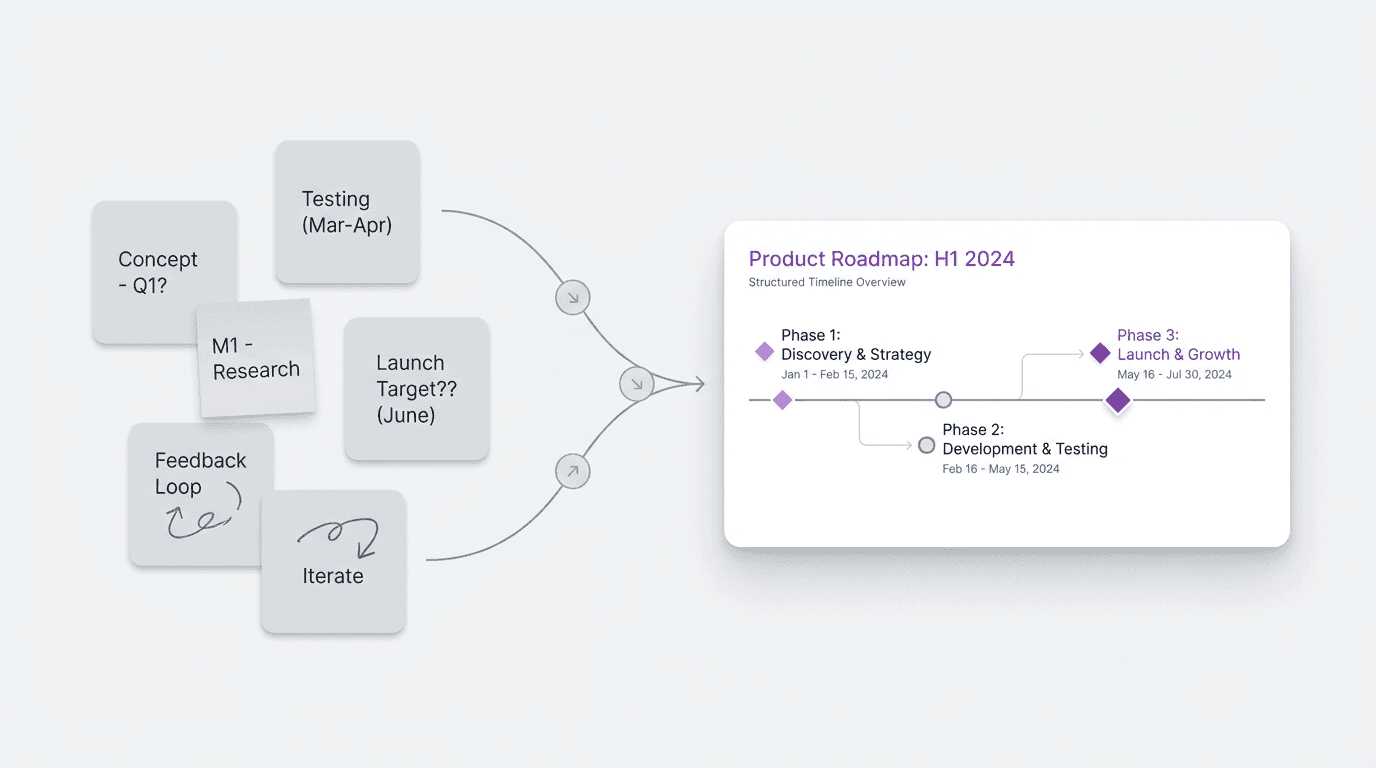
A project timeline template is a sequence format, not a layout exercise
The format is already doing most of the work. A project timeline is meant to answer a few practical questions:
- what happens first
- what happens next
- when key milestones land
- where dependencies affect timing
- how the project moves from start to finish
Timeline work goes wrong when teams adjust colors, blocks, or orientation before the sequence is clear.
A good project timeline template reduces that confusion by making the structure explicit early. It gives the project a visible order before the team starts polishing presentation details.
What a useful project timeline template needs to show
A project timeline template does not need to include every project detail. It needs to show the pieces that help someone understand the flow of work.
In most cases, that means:
- phase or milestone
- date or date range
- key deliverable
- owner or team
- dependency or risk note
Some timelines also need review checkpoints, approval gates, or launch moments, especially when multiple teams are involved.
The important thing is that the template stays readable. A timeline that tries to carry every project detail usually stops functioning as a timeline. It becomes a crowded project plan masquerading as one.
The better version is selective. It shows enough to guide coordination without overwhelming the reader.
A simple project timeline template you can reuse
For most planning work, a straightforward timeline template looks like this:
| Phase | Date range | Main deliverable | Owner | Dependency or note |
|---|---|---|---|---|
| Discovery | April 1 to April 5 | Finalize scope and inputs | Product | Needs stakeholder alignment |
| Drafting | April 8 to April 15 | First complete draft | Content | Depends on approved outline |
| Review | April 16 to April 19 | Cross-functional review pass | Product and Design | Requires consolidated feedback |
| Revision | April 22 to April 26 | Final revised version | Content | Depends on review resolution |
| Launch | April 29 | Publish and distribute | Marketing | Needs final sign-off |
This format works because it gives the reader a clean way to follow the project from one stage to the next.
It is especially useful when a timeline needs to be copied into a deck, shared in a doc, or turned into a visual timeline later. The structure is already there.
Three practical project timeline examples
The template should change slightly with the kind of work.
Example 1: Content launch timeline
This version works well when the project moves through a clear publishing path.
Typical stages:
- research
- outline
- first draft
- review
- revision
- publish
This kind of timeline is useful because it mirrors a production workflow people already understand. It is easy to explain, and it creates a natural rhythm for approvals and handoffs.
Example 2: Cross-functional product timeline
This version works better when multiple teams contribute at different moments.
Typical stages:
- planning
- design
- build
- QA
- launch prep
- release
The key difference here is visibility across dependencies. A product timeline often needs slightly stronger notes about who owns each stage and what has to happen before the next one can start.
Example 3: Client delivery timeline
This version is useful when the timeline supports external communication as well as internal planning.
Typical stages:
- kickoff
- first delivery
- feedback round
- revision round
- approval
- handoff
The value here is clarity. A client-facing timeline works best when the language is simple, the phases are recognizable, and the deliverables are easy to discuss in conversation.
A client timeline often serves as both a planning document and a guide for conversation.
Why project timelines get harder than they should
Deadlines live in messages. Deliverables live in notes. Dependencies are implied in meetings. Owners are known informally but not always written down. By the time someone tries to build the timeline, the project logic exists, but it is still spread across too many places.
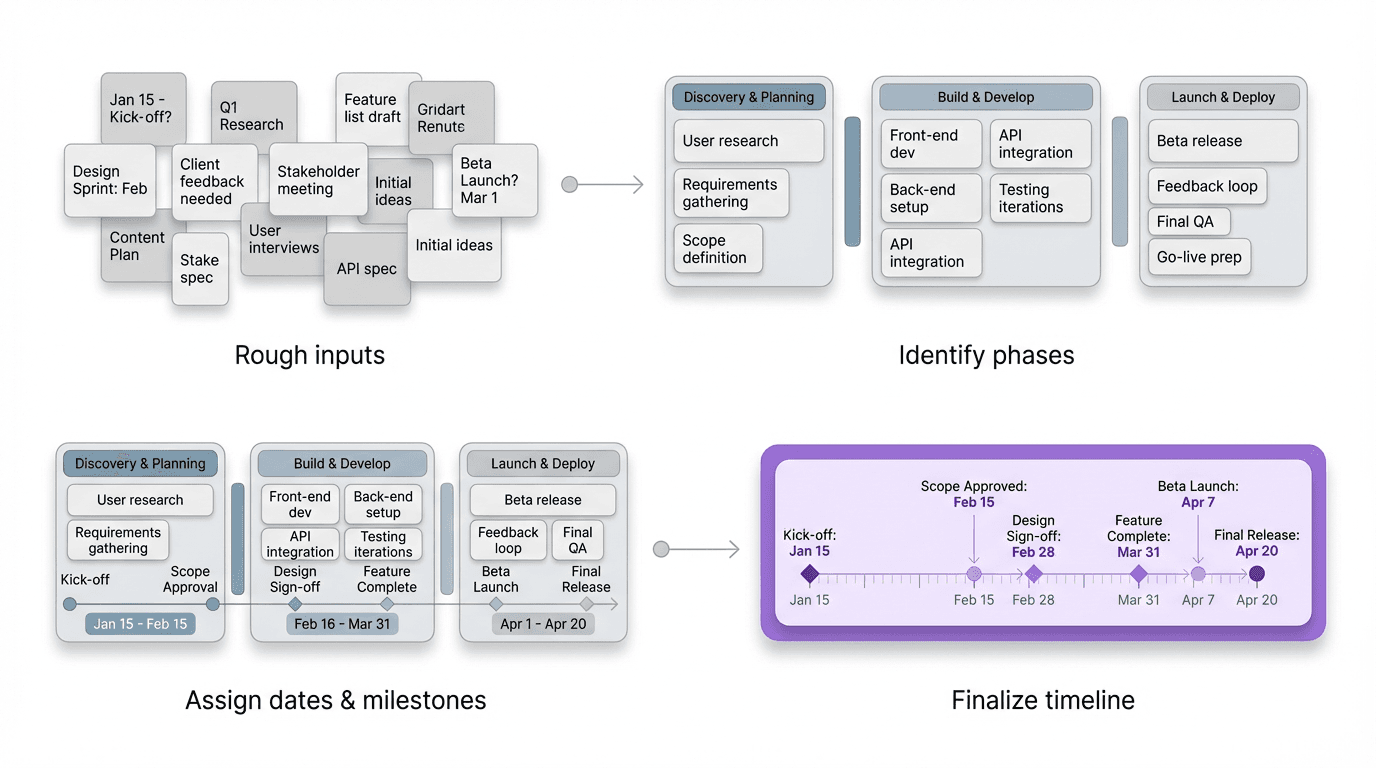
The template cannot resolve that fragmentation on its own. First, gather the rough planning material and put it into a clear sequence.
How to get from rough plan to finished timeline faster
If the output is already known to be a timeline, the most useful move is to organize the source material around the format immediately.
That usually means:
- identify the major phases
- assign the milestone or deliverable to each phase
- add timing, even if it is provisional
- surface the dependencies that could shift the sequence
- remove background detail that does not help someone understand the flow
The timeline provides a clear boundary, so the job is to compress the project into that structure.
FormaLM can turn the scattered source material into a usable draft without making the team rebuild the sequence from scratch each time.
When to use a table timeline, and when to use a visual timeline
A table is often the best starting point.
It is compact, easy to edit, and flexible enough to share in docs or planning notes. It also makes it easier to revise dates and owners without rebuilding the whole layout.
A visual timeline helps when the project needs to be presented to others. Leadership updates, client communication, and cross-team planning all require people to grasp the flow quickly rather than simply store the information.
The important thing is not to confuse these two stages.
Many teams jump straight into visual timeline design before the sequence is stable. That usually creates extra revision work. The better workflow is to get the content into a reliable timeline structure first, then convert it into a more visual format if the audience needs it.
What makes a project timeline easy to explain
The clearest timelines usually share three qualities:
- the phases are named simply
- the sequence is obvious
- the scope of each stage is visible without extra narration
Together, these qualities make the timeline easy to present or send without a long explanation.
A timeline is doing its job when another person can understand the project flow at a glance and ask better questions because the structure is already visible.
An over-designed timeline may look finished while leaving the project difficult to understand.
The best project timeline template is the one that helps you finish the sequence
Choosing a template sets the outer frame. The remaining work is to choose the phases, name them clearly, assign time, show dependencies, and keep the result readable.
A strong template gives those decisions a boundary. FormaLM helps move rough project material through that structure and into a usable version faster. The value is a sequence clear enough to guide the work.